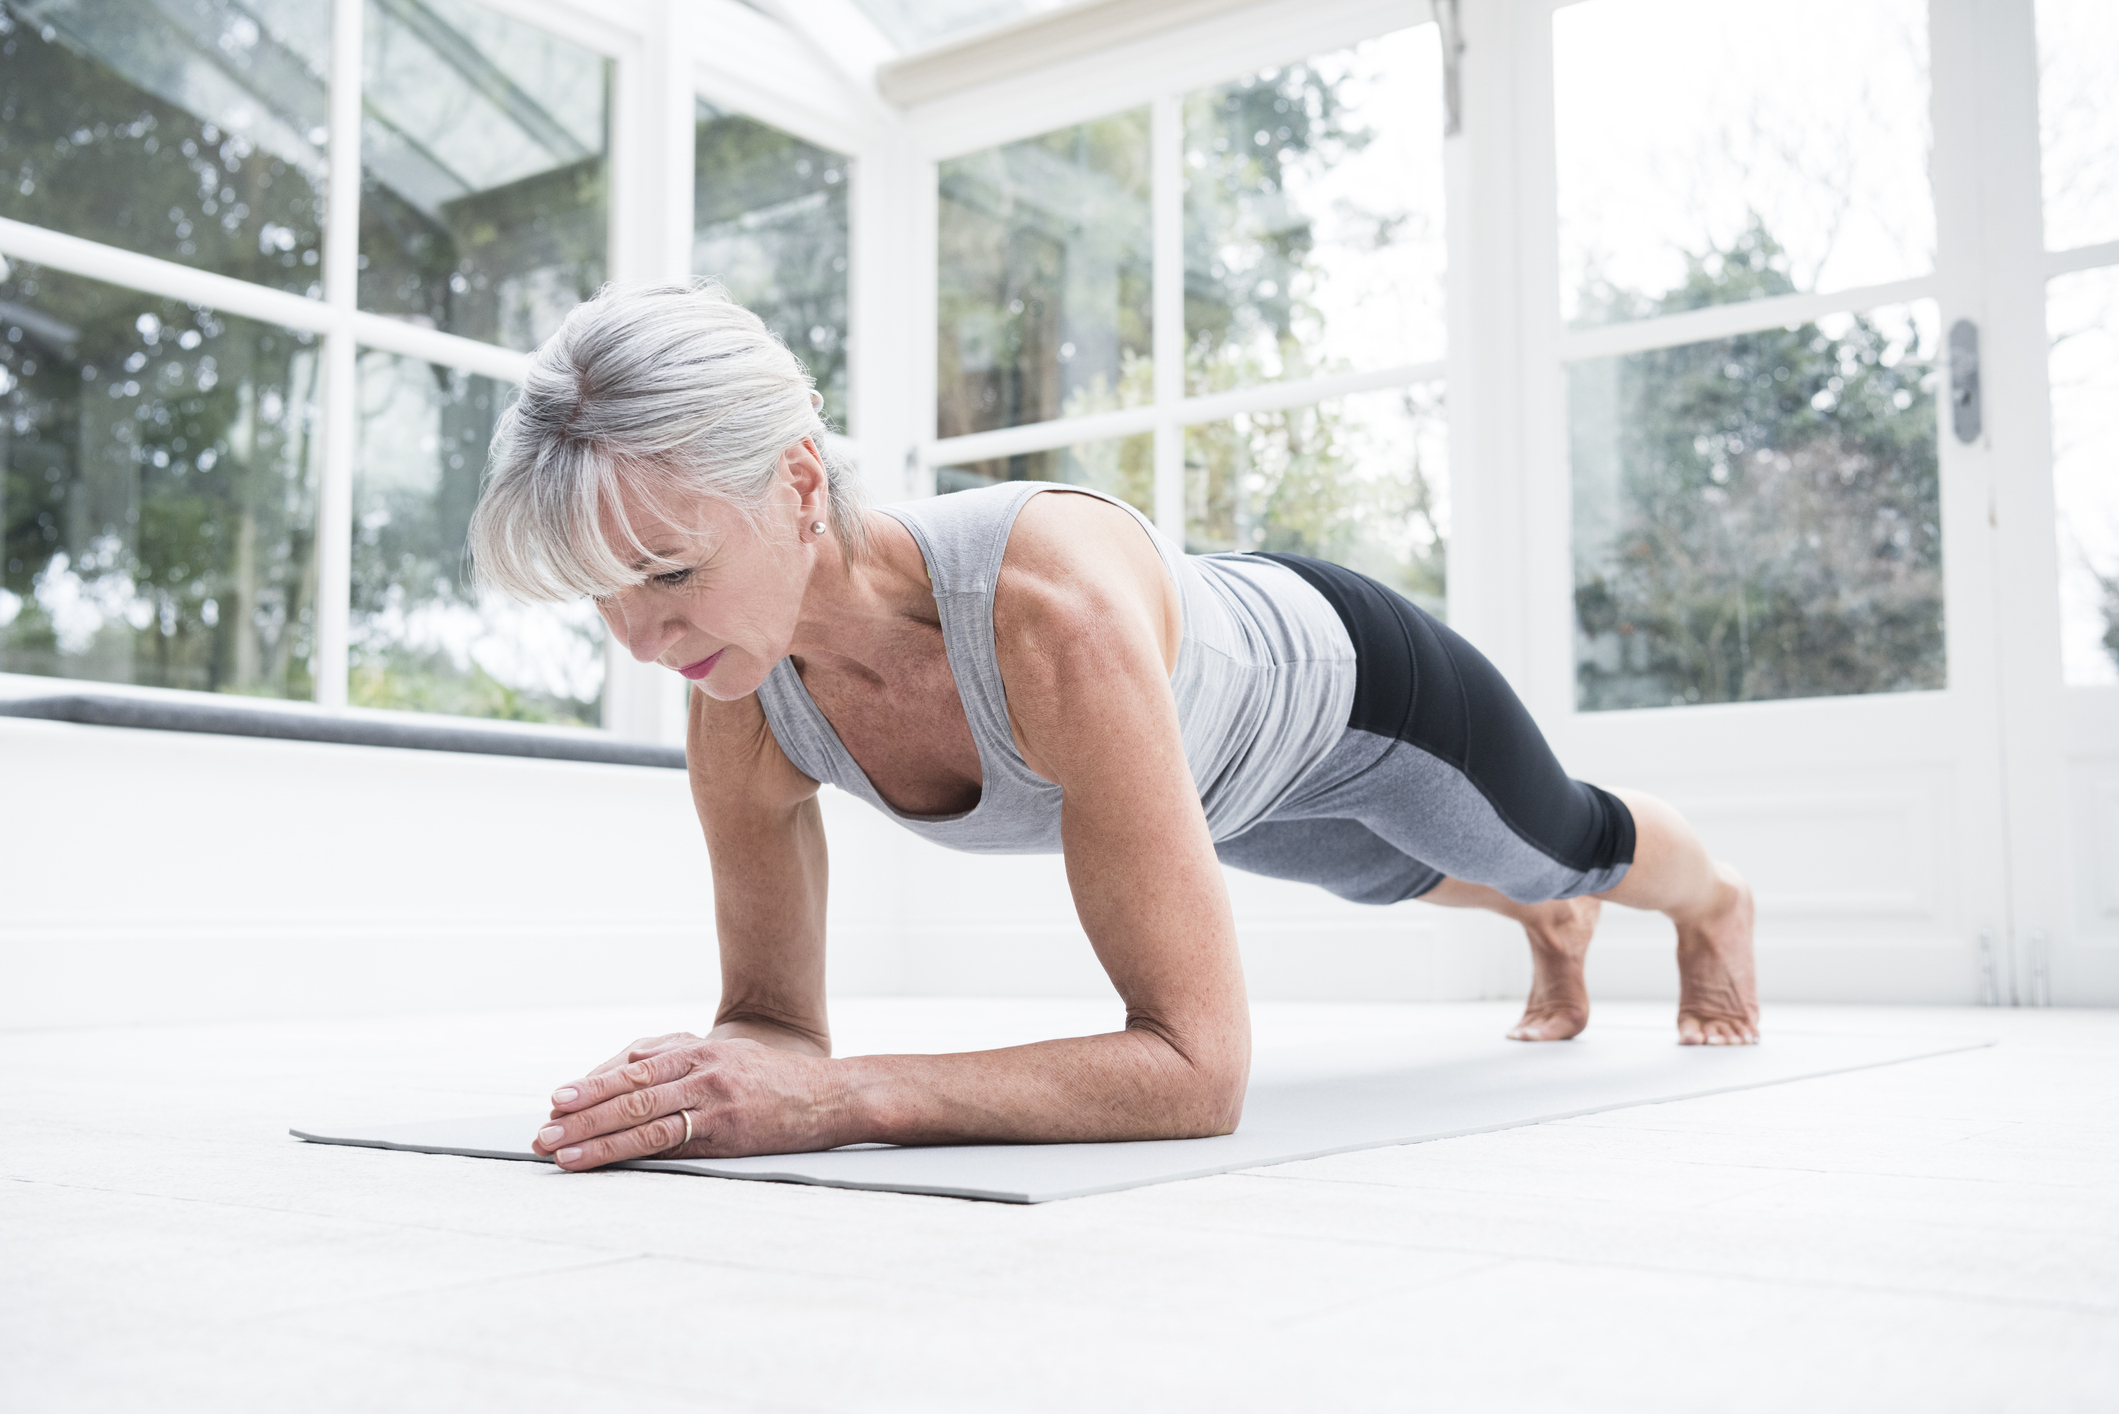
Our muscles deteriorate with increasing—and distressing—speed after we pass age 60. That age-related muscle loss doesn’t just affect our arm and shoulder muscles. It also weakens the muscles of the core, including the abs, obliques and muscles in the back and pelvic floor. Loss of strength in these core muscles can lead to a host of physical issues, including back pain and poor posture. As we get older, it also can lead to difficultly rising from a lying to a seated position…or from sitting to standing…and that can make it difficult to live an independent life.
Doing functional core exercises can help maintain these crucial muscles, says our Bottom Line expert Jonathan Su, DPT. But the best core exercises for seniors aren’t the sit-ups and crunches that first to come to mind. In fact, performing those exercises regularly can cause lower back pain and herniated disks in the spine, an increasing risk as people age.
The following four exercises are effective for core strength and have much lower risk for injury. They’re great options whether you’re in search of core exercises for beginners or if you’re already in excellent shape and you want to keep it that way as you age.
For each of the following exercises: Hold the position for 30 to 60 seconds. If you can’t make it to 30 seconds at the outset, hold for as long as you can and strive to last a little longer each time. Complete each exercise two to three times on two to three non-consecutive days each week.
Helpful: Each of the exercises below also can be used to strengthen the muscles of the pelvic floor—simply engage the muscles that you would use to stop urine flow while performing the exercise. Engage these muscles with greater than 50% effort but less than 100% effort.
Front plank
Position yourself on the floor or a mat, facing down, supported by your toes and elbows. Your elbows should be directly below your shoulders, your forearms extended on the floor or mat in front of you. Your heels should be directly above the balls of your feet. Try to form a straight line from your head all the way down to your ankles—your hips should not be lifted above this line or allowed to sag below it—and hold this position. The front plank is very effective for strengthening the abdominal muscles in the lower front of the torso.
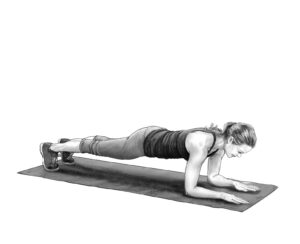
If you struggle to hold the front plank position, perform this exercise with both your knees and toes on the ground. In this variation, you do not need to maintain a straight line from your head through your knees. When this becomes easy for you, try the full front plank position once again.

If maintaining a front plank for 60 seconds is simple for you, do this exercise while wearing a backpack that contains weight. Start with a modest amount of weight, such as five pounds, and add to that slowly as needed. A weight plate designed to be used with a barbell is a good choice here, but anything of the proper weight will work. Caution: People with back problems should be particularly careful about adding weight.
Bird dog
Position yourself on your hands and knees on the floor or a mat, knees hip-width apart, hands flat directly below your shoulders. Now point one arm out in front of you and the opposite leg out behind you. Hold this position.
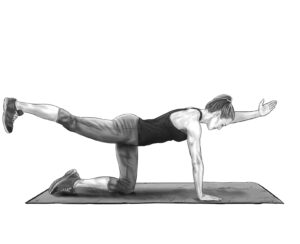
It isn’t necessary to extend the arm and leg perfectly straight out—illustrations of this exercise inevitably show this. In fact, physical therapists have discovered that it’s actually more effective to angle the arm and leg slightly outward from the body rather than aim completely straight forward and back. Either way, your extended arm and leg should be parallel to the floor or mat beneath you…your back should remain straight…and your hips should be square to the surface. Repeat the exercise with your other arm and leg. This exercise is especially useful for strengthening the lumbar multifidus muscles that run along the sides of the spine, which provide crucial support.
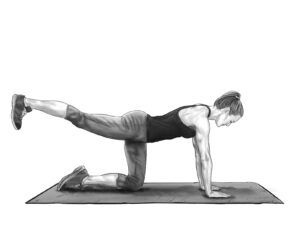
If you struggle to maintain the bird dog position, do leg-only bird-dogs—extend a leg out behind you, but keep both hands on the floor.
If holding the bird dog position for 60 seconds is easy, wear ankle and wrist weights while you do it or hold a small dumbbell in your extended arm in lieu of wrist weights.
Side plank
Lie on one side on the floor or a mat, with your legs out straight and the upper leg and foot stacked directly on top of the lower leg. Lift your upper body off the surface by positioning the elbow of your lower arm directly under the shoulder. The forearm of this lower arm should be on the floor or mat for balance. Your upper hand can be placed on your upper hip. The only parts of your body in contact with the surface should be the elbow, forearm and hand of your lower arm and the outside of your lower foot. Try to maintain a straight line from your head all the way down through your feet, then hold this position. Repeat on the other side. This is a great exercise for the oblique muscles on the sides of the torso.
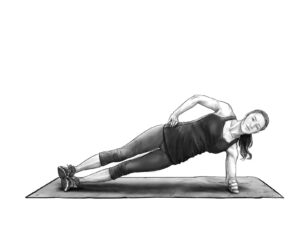
If you need something a bit easier to start: Bend your legs 90 degrees at the knees and allow the outside of your lower knee to remain on the floor or mat. In this variation, strive to create a straight line from your head to your knees, rather than all the way to your feet. Don’t feel bad if you use this variation—many people struggle with the side plank.

If you can easily maintain a full side plank for 60 seconds, use your upper hand to hold a small weight on your upper hip while performing the exercise. Increase this weight as needed.
Static leg lift
Lie flat on your back on a floor or mat, with your knees bent and your feet flat on the floor. Your arms should be extended on the surface alongside your body. Lift your legs by bending your hips and knees to 90-degree angles, so your upper legs (thighs) point straight up toward the ceiling and your lower legs are parallel with the floor.
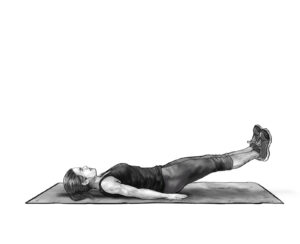
When you can easily hold this position for 60 seconds, slowly increase the difficulty by extending your feet approximately one inch farther out away from your head while keeping your lower legs still parallel to the floor—your hips and knees are now at slightly greater than 90-degree angles.
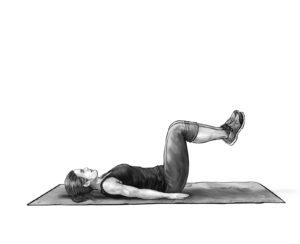
When this, too, becomes easy, extend your feet out a tiny bit farther. Your goal is to eventually have your legs and feet hovering a few inches off the floor. Keep your feet and legs together as you do this, and don’t arch your back—your back should remain as flat against the surface beneath you as possible. End the exercise by bending your knees to your chest and then placing your feet flat on the floor. This will protect your lower back. This exercise is effective for your abs.
If the static leg lifts described above don’t pose a challenge, do them while wearing ankle weights.

